
At some point in their growth as a cyclist, every rider reaches a point where it’s time to upgrade their bicycle, or at least upgrade the components on it. There are several motivations for the need to upgrade, ultimately leading to the question, “How do you do a drivetrain conversion properly, or even just upgrade components?”
Perhaps you initially invested in a bike with a high-quality frameset that was lacking in the drivetrain components, and now you’ve noticed the slightly clunky shifting is not as responsive as you require.
Or maybe you’ve been temped by the Instagram-worthy bike builds that showcase sleek, simple 1x drivetrains, and you want to make the jump yourself.
Regardless of your motivations for upgrading, it can be a valuable investment with a high return. Drivetrain upgrades can be quite affordable, compared to the price of a new bike, and can give your bike a new, fresh feeling that inspires and excites you to get out and ride. It can provide that “new bike” feeling we all love so much, without requiring the new bike price tag.
Read on to learn more about drivetrain basics and how to upgrade or convert your drivetrain yourself.
Table of Contents
Drivetrain Basics
Before we dig into the more complex topic of how to convert or upgrade your drivetrain, let’s first cover the basics of the drivetrain to ensure a fundamental understanding.
Chainring and Front Derailleur
The front portion of the drivetrain consists of the front derailleur and the chainrings. The front derailleur is mounted to the seat tube and controls the chain shifting amongst the chainrings. If changing from a 3x to a 2x or 1x drivetrain, the front derailleur will be upgraded, or removed altogether.
The chainrings play a large role in the gear ratios available to your bike. Chainrings for 3x and 2x drivetrains have teeth that are shaped to allow for easy, efficient transitions from one ring to another. Chainrings for 1x drivetrains feature an alternating narrow-wide tooth pattern than ensures proper retention of the chain.
Swapping out chainrings can have a huge impact on your bike’s gearing and should be the first place you look if your bike feels over or under-geared for your riding.
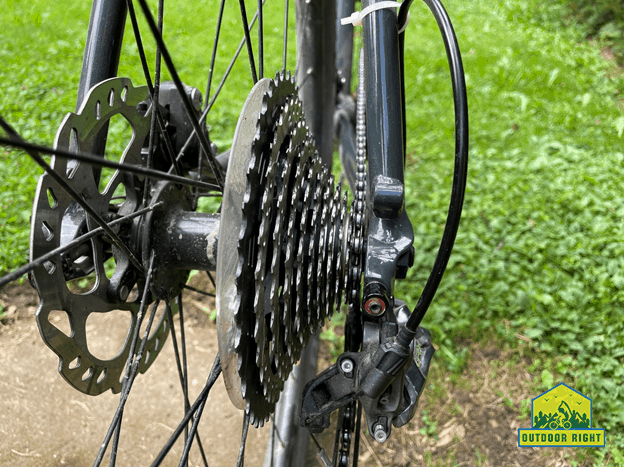
Cassette and Rear Derailleur
The rear portion of the drivetrain consists of the rear derailleur and the cassette (or freewheel). The rear derailleur controls the chain transitions across the cassette or freewheel and upgrading it can greatly improve the shifting of your bike.
Freewheel vs cassette– do you know the difference?
The cassette or freewheel is the stack of 8-12 gears on the rear wheel of the bike, but the two are not synonymous. A freewheel is a single-piece unit that is threaded onto the rear axle of the bike, tightening itself as you pedal. On the other hand, a cassette is a stack of individual cogs that slide onto the keyed rear axle and are held in place by a lock ring.
It is very important to note that freewheels and cassettes are not interchangeable. If you want to upgrade from a freewheel to a cassette, you will need a new rear wheel that can accommodate the upgrade. Cassettes offer a level of freedom that freewheels do not, offering more cogs in the stack of gears that can be changed out individually to fine tune your gear selection.
Planning for the Conversion
Despite seeming like a daunting task at first look, converting or upgrading your drivetrain yourself is quite the manageable DIY project. There are some important considerations that will be discussed, such as component compatibility and required adjustments.
In this article, we will focus primarily on conversions from a 2x/3x drivetrain to a 1x drivetrain. This conversion is one of the most popular upgrades people are performing on their bikes, and the lessons learned in this article can be applied to drivetrain upgrades for 2x and 3x drivetrains as well.
Chainring & Hardware
Converting from a 2x drivetrain to a 1x drivetrain will likely require you to purchase a new, 1x-specific chainring. These chainrings will feature gear teeth designed to effectively retain the chain to ensure it does not fall off during shifting or off-road riding.
Furthermore, the gear ratios provided by one of your existing chainrings will likely not work well. You will want something in the middle of your existing chainrings.
For this conversion, I would recommend using an online gear ratio calculator to help select the appropriate components. Assess your old drivetrain gear ratios and think about what adjustments you want to make for your new drivetrain. Your new 1x drivetrain can achieve a larger range of gear ratios or shift the range of gear ratios, if the appropriate chainring and cassette combination is selected.
In addition to purchasing a new chainring, you will likely need to purchase new, shorter chainring bolts, too. This is important! I forgot to do this for my first 1x conversion, and I had to tape my chainring to the crank for a week until the new bolts arrived. Obviously, this meant I didn’t ride for a week and then had to wrap up the final steps of the conversion a week later.
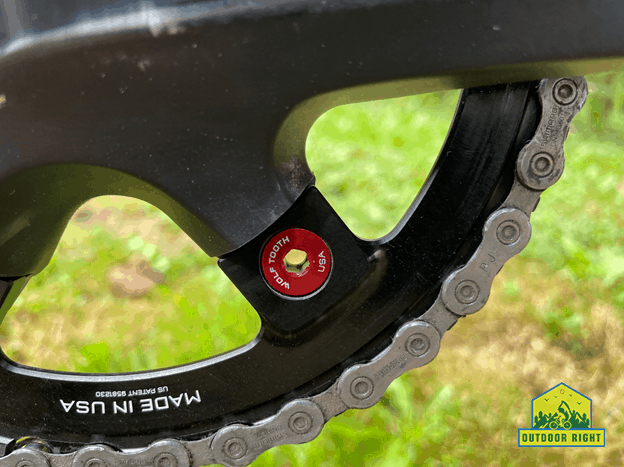
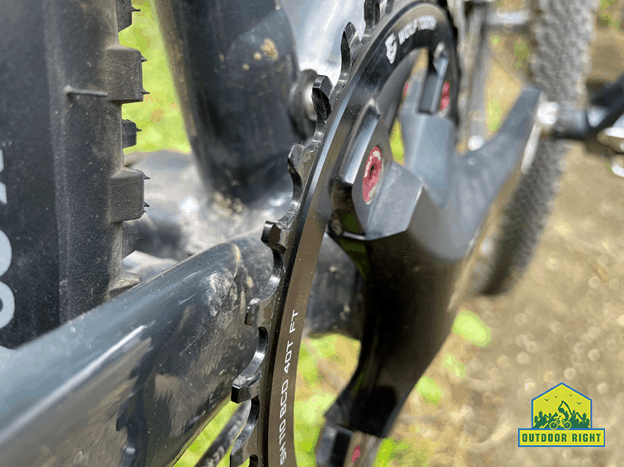
For my conversion, I swapped out my Shimano 105 compact 50/34 for a Wolf Tooth Components 110 BCD 40T chainring with a Wolf Tooth Bolts & Nuts Set of 4 for single-ring. I recommend Wolf Tooth chainrings for this conversion. They offer a variety of options that can fit on your existing crank, so be sure to verify that the chainring you purchase is compatible with your crank.

- Mount type: 110 BCD Asymmetrical 4-Bolt
- Teeth: 40t
- Offset: Non-boost
- Chain Compatibility:Drop-Stop B tooth profile for all 9, 10, and 11spd chains or...
- Material 7075-T6 aluminum, Made in USA by Wolf Tooth Components

- Precision Machined Chainring Bolts for Single-Ring Drivetrains
- These single chainring optimized bolts have a 4 mm hex socket on the bolt and a...
- These are 6 mm long so they work perfectly with any bolt on single chainring...
- 4 bolts and nuts weigh only 8 grams, size M8 x.75 x 5
- 7075-T6 aluminum, Made in the USA
Rear Derailleur & Cassette
You will also want to purchase a new rear derailleur and cassette. I would recommend updating your rear derailleur to a higher-level component, as this will provide improved reliability and faster shifting.
With only one derailleur to purchase (it is a 1x, after all), you can vastly improve your bike’s performance without having to spend too much. Also, purchasing a clutch type derailleur is ideal for 1x builds, as they keep the chain from coming off the bottom of the chainring.
Finally, ensure that your new rear derailleur is compatible with your new cassette. Your cassette will likely have larger cogs than your previous one to allow you reach lower ratios necessary for steep climbs.
Derailleurs are limited in the maximum size cog they can work for, so be sure that your derailleur can handle your cassette. Although it may seem obvious, you need to be sure you purchase an 11-cog cassette if you have an 11-speed derailleur. This consistency is critical.
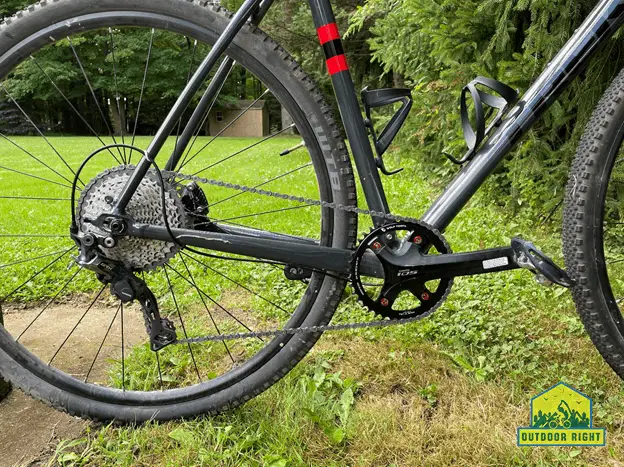
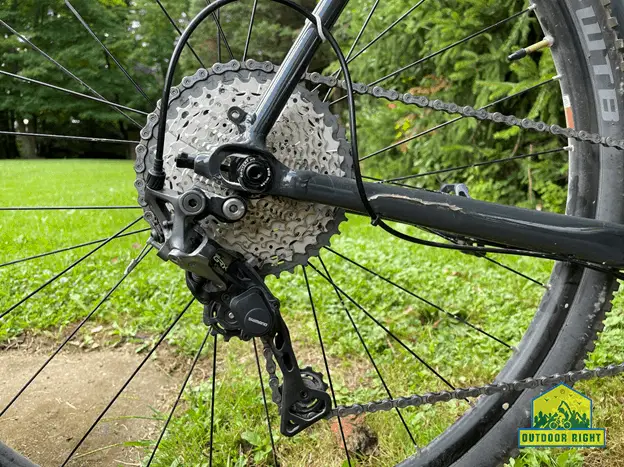
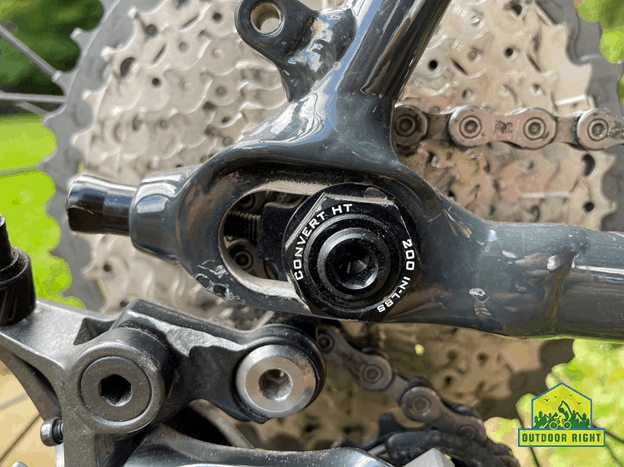
For my 1x conversion, I replaced my Shimano 105 rear derailleur and Shimano 105 11-32 cassette with the Shimano GRX RD-RX812 rear derailleur and a Shimano XT CS-M8000 11-42 cassette.

- Enhanced durability with die-cast aluminum construction, ensuring reliable...
- Advanced Engineering features a long cage design and precision engineering that...
- Innovative Clutch technology with gravel-tuned tension and the Shadow RD+ chain...
- Designed for versatility and quick upgrades, this rear derailleur is compatible...
- Sleek Black finish combined with lightweight construction (267 grams) and...

- Cog Sizes: 11 - 40 t, 11 - 42 t
- Cog Material: aluminum and steel
- Hub Type: Shimano or SRAM 11-speed Compatible
- Recommended Use: mountain bike
- Manufacturer Warranty: 2 years
Ditching the Excess Up Front
The first step in converting to a 1x drivetrain is the most liberating part of having a 1x: removing the front derailleur and front shifter.
Before taking anything off, shift your rear derailleur to the smallest cog; this will make things easier for you later. To get started, remove the chain from your bike via the quick link or with a chain break tool, if required. This detangles the chain from the derailleurs and will allow everything to be removed and mounted easily.
With the chain off, release the cable clamped to the front derailleur and remove the front derailleur. Remove the cable and cable housing from the frame of the bike, and you can then even remove the front shifter altogether. As a note, if you ride a dropbar bike, you will need to remove handlebar tape to fully remove the front derailleur cable from your bike.
Changing Out Chainrings
Now that the front bit of your drivetrain is looking uncluttered, go ahead and remove your old chainrings. There are a few bolts to remove, and then you should be able to fish the chainrings out around the crank arm without needing to remove anything else.
Reverse the process to put our new chainring on. It’s important to note that, for a 1x drivetrain, you want the chainring to be as close to the centerline of the cassette as possible. Typically, this happens by mounting the chainring to the inside of the crank arm. This is not always the case, though, so confirm visually prior to tightening the new chainring in position.
At this point of the installation, you should mount the chainring using the new nuts and bolts you ordered. The bolts from the old chainring will be too long and will also lack the nut required for the new 1x chainring.
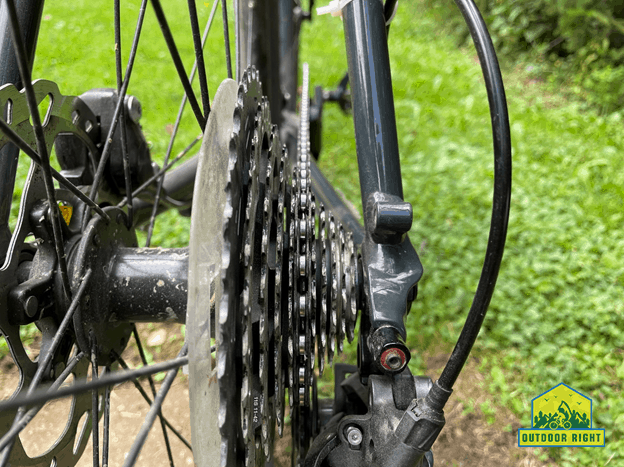
Replacing the Cassette
Replacing your cassette is a simpler task than it appears to be, only requiring a few special tools and some helpful tips to avoid a mess of gears. The three tools you will need for this task are a chain whip, a lockring remover, and an adjustable crescent wrench.
Removing the Old Cassette
Begin by removing your rear wheel from the bike and removing the quick-release axle or the thru-axle entirely. Insert the lockring remover into the lock ring until it is firmly seated.
Stand behind the wheel, with the wheel vertical and tire on the ground, leaned against you, and drape the chain whip over the cassette. Drape the chain whip on a larger cog that will provide more torque for loosening the cassette. Adjust the crescent wrench to fit on the lockring remover.
With the chain whip in your left hand and the crescent wrench in your right hand, push the two in opposite directions, loosening the lock ring. Once loosened, you can set down the tools and finish removing the lock ring by hand.
Slide the cassette off the hub carefully, so as not to drop any of the cogs or spacers. It is especially important to maintain the organized stack of cogs if you plan to reuse the cassette for any reason.
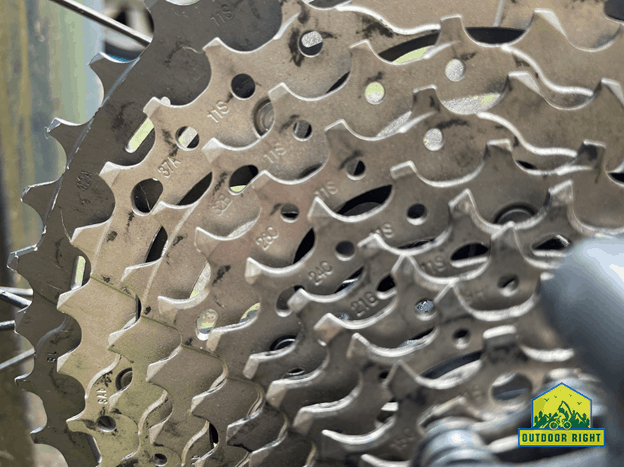
Install the New Cassette
When installing the new cassette onto the hub, it is important to maintain the stack of cogs as it is packaged. The needed spacers are included, and everything is in the appropriate orientation right out of the box, and you do not want to let any of the spacers fall or cogs move, or you will have to re-stack the cassette carefully.
There are grooves in the cassette that line up with the hub such that the cassette can only go on in one orientation. Once on the hub, rethread the lockring using the lockring removal tool and tighten it until snug with a wrench.
At this point, it is important to torque the lockring to manufacturer specifications. If you do not have the appropriate torque wrench tools at home, it is worth stopping by your local bike shop to have them torque the lockring.
After you have properly torqued the lockring, you are ready to put your rear wheel back on the bike and move on to the next step of the conversion.
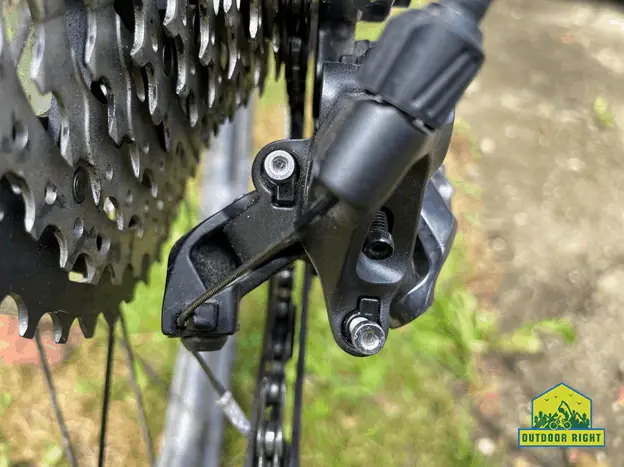
Rear Derailleur Upgrade
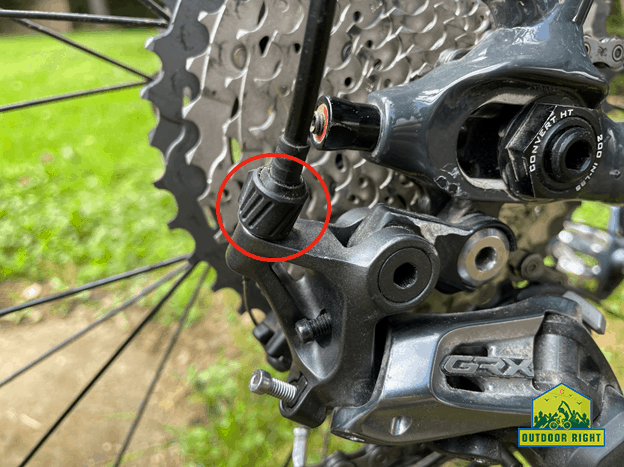
If you recall, earlier we shifted into our smallest cog before removing the chain, which will now help us with removing the rear derailleur. Begin by loosening the clamp bolt that holds the cable and fully remove the cable from the derailleur.
If you have not already done so, remove the chain from the derailleur. Now you can remove the derailleur’s mounting bolt by simply unscrewing it counterclockwise, and your derailleur should lift right off the bike.
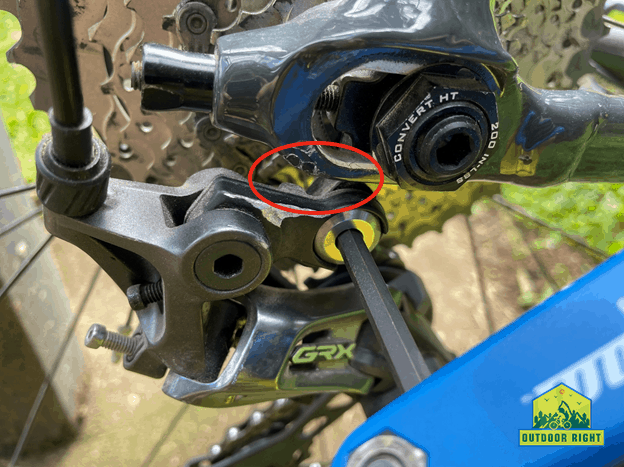
Before mounting the new rear derailleur, apply waterproof grease to the mounting bolt to prevent the threads from seizing. Thread the derailleur into the hanger, ensuring the b-screw or tab is behind the flat on the back of the derailleur hanger. With the derailleur in the correct position, fully tighten the mounting bolt.
Route the chain through the jockey wheels, onto the smallest cog, and then reconnect the master link. Adjust the high-limit screw (H) to align the upper jockey wheel with the smallest cog. Thread the shifter cable back into the clamp plate of the derailleur, pull it tight and lock it down with the clamp plate.
Now, you can proceed to fine tune the rear derailleur to provide quick, crisp shifting. Remember to set the low-limit screw, and adjust the cable tension using the barrel of the rear derailleur. Be sure to go for a short test ride to help fine tune the shifting, and that’s all there is to it!
Other Considerations
One of the most important considerations for a drivetrain conversion is component compatibility. The last thing you want is to order components that don’t work with one another or don’t fit on your existing build.
First and foremost, you need to ensure that your rear derailleur can function with the gear range of your new cassette, as mentioned above.
You will also need to ensure that the new cassette is compatible with the hub of your rear wheel. Since cassettes are keyed to fit with the ridges of a hub, ensuring that the unique pattern will be compatible is an important step. This information is typically readily available on the manufacturer’s website for both the wheel and the cassette.
Selecting your cassette range and chainring size is worth some time and consideration. Using online gear ratio calculators is helpful for this, and you should compare a few different gearing combinations. Compare your old gearing with some new options, as well, and seriously consider how you want to adjust your gearing.
As an example, for my 1x conversion, I wanted to do more off-road riding and often found myself over-geared on steep climbs. To prepare for this, I greatly increased my low-end gearing and have loved the result. My previous smallest ratio was a 34/32 (1.06), which I changed to 40/42 (0.95). While it may seem like a small change on paper, the difference is noticeable on steep, gravel climbs!
The final consideration for your conversion is chain length. Changing your gear ratios will affect the length of chain required, and you may need a new chain altogether, though this is not always the case. I was able to reuse the same chain for my conversion, I only needed to move my rear wheel back in the horizontal sliding dropout to properly tension the chain after the fact.
Conclusion
Before beginning the conversion, it is worth investing some time to plan it out. Select the components that will suit your riding style, confirm their compatibility with one another, and ensure you purchase all the necessary hardware and tools, as well. A little extra time spent planning will save you a lot of time waiting for parts that were forgotten or incompatible.
A drivetrain upgrade or conversion can breathe new life into your bicycle. It is a great way to give your bike a needed refresh and has an enormous impact on ride performance. Without spending too much money, you will get that “new bike day” feeling and learn another valuable skill to add to your DIY bike maintenance repertoire.

Mitchell Turk is outdoors enthusiast with a lifelong passion for bicycling. He previously worked at his local bike shop before entering the world of engineering, and he may even enjoy geeking out over bike tech more than riding his bike!
Originally a roadie, Mitch dabbled in mountain biking for a couple years and then jumped on the gravel bike bandwagon. He now spends his free time seeking out gravel rides and weekend-long excursions. His ideal outing combines biking, hiking, and climbing for a whole-mountain adventure.