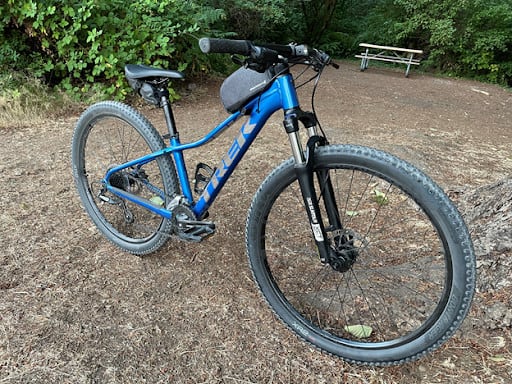
With springtime around the corner, it’s never too early to start thinking about preparing your bike and gear for riding season. But how do you get your MTB ready for riding season? You leave that to the experts at the bike shop, right? Well, maybe not this year.
Bike shops have always been inundated by the pre-season rush of cyclists trying to get their bikes tuned up in time for the first warm days. Now more than ever, with the huge increase in cycling interest resulting from the coronavirus pandemic, bike shops will continue to be swamped with pre-season tune-ups.
While you could take your bike to your local shop to get it prepped for the season, it will likely be in their shop for at least two weeks, and it will certainly not be cheap. You could be looking at upwards of $90 and a month of time for some relatively simple preparations that you can learn to do at home.
Given the current climate of cycling popularity and short-staffed businesses, it’s now more valuable than ever to be as self-sufficient as possible. This idea extends into learning some at-home mechanic skills, so you can keep your equipment in good condition and ready for the upcoming season.
In this article, we are going to discuss 5 things to get your MTB ready for riding season. Essentially, you will be learning how to perform a very basic tune up for your MTB at home.
We still value our local bike shops and recommend having experienced mechanics review your bike regularly, but you can do the majority of the pre-season preparations in your own garage, barring any serious mechanical failures or issues. With that in mind, let’s dive into a pre-season MTB tune-up!
Table of Contents
Clean the whole bike
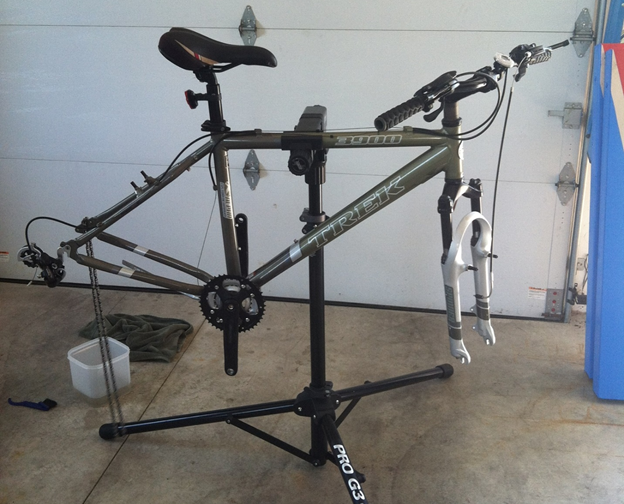
The easiest way to clean your bike is in a bike stand with the wheels off.
The first step in a pre-season tune up is giving your mountain bike a thorough clean.
I know you’re questioning, does he really expect us to wash our bike in the middle of winter? That’s part of a tune-up?
Absolutely. Clean equipment always functions better than dirty equipment.
Even if you cleaned your bike after your last ride of the previous season, I’d be willing to bet it has sat and collected dust, turning any grease or lube into a crusty grime, on top of the layer of dust coating the frame. If you take your bike to your local shop for a tune-up, the first thing they will do is clean it, too.
If you have a bike stand at home, it’s easiest to put your bike in the stand, remove both wheels and proceed to clean. Otherwise, you can simply lean the bike up against something for the bulk of the cleaning.
Using a high-pressure hose is not advisable, as it can damage the bearing systems used throughout the bike.
The best way to clean a bike is by using a bucket of water, rags, and a bike cleaning solution. If parts are extremely dirty, gently using a brush is recommended for occasional cleaning.
Begin by cleaning the entire bike frame, as well as the cassette, chainrings, and crank.
Additionally, you can clean the rims and wheels, but be careful not to get soap on the rotors or pads of the disc brakes. There are dedicated cleaners that can be used for the rotors, if necessary.
We recommend cleaning your bike in a bike stand with the wheels removed because it is easiest to thoroughly clean all the nooks and crannies of the bike. It also helps ensure that you keep your rotors safe from any accidental splashes of soapy water, as mentioned above.
The final part to clean is your chain, which can typically be done with a rag and a degreaser. If your chain is exceptionally grimy, you will want to use a dedicated chain cleaning device.
Now that your bike is completely clean, it should be thoroughly dried with clean rags. It is not recommended to let water sit on your bike, especially on the mechanical components. Thoroughly drying is best to maintain proper function and prepares the components for one of the next, and most important, steps: lubrication.
Tire Preparation
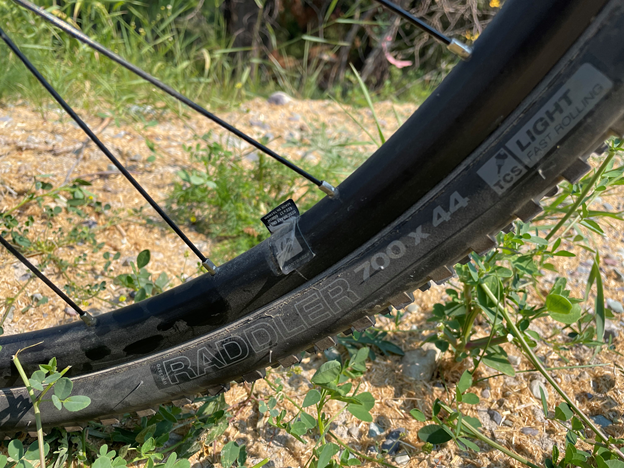
Cleaning off dirty tires will help you with inspection the condition of the tire and its seal to the rim.
A pre-season inspection of your tire quality is an important precaution. After cleaning the wheels, you will want to inspect your tires for any signs of dry rot, punctures, or excessive wear.
Start with a quick visual inspection prior to airing them up, just to confirm there are not any obvious issues.
If you haven’t touched your MTB in months, your tires are likely flat, low on sealant, and possibly no longer seated to the rim. Let’s correct all of this.
Start by adding sealant to your tires in accordance with their size. You will need to add at least 2-3oz of sealant to each tire, likely even more than that if your tires are no longer seated to the rim and the old sealant has dried.
Air up your tires to fully seat them to the rim. If you do find yourself reseating your tires, you also need to shake the sealant all around the inside of the tires to guarantee its seal. For more information about resealing your tubeless tires, check out this article that goes into greater depth on how to do this.
Now that your tires are resealed and aired up, wipe them down one last time to clean up any sealant. Perform a final, close inspection of the tires. Ensure there are no signs of dry rot or leaks, and then reinstall the wheels back onto the bike.
Drivetrain Preparation for Riding Season
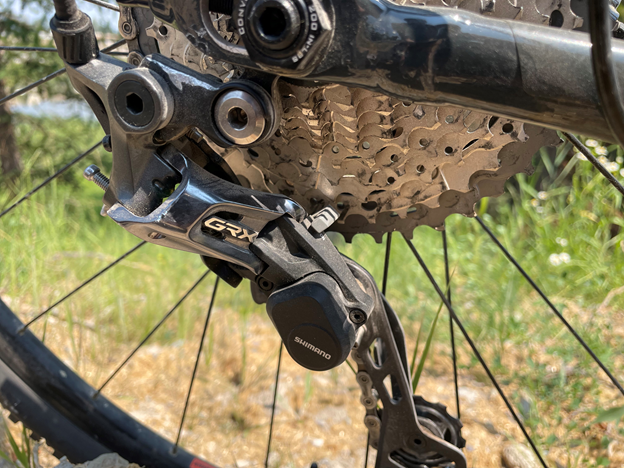
That’s a grimy drivetrain! Some degreaser is needed to clean off that cassette, followed by lube for all the pivot points of the derailleur.
The drivetrain was thoroughly cleaned and dried at the start of our pre-season tune-up, which is an important first step. You want to get your drivetrain as clean as possible at the start of the season. This makes it easier to keep it clean throughout the year, improving its performance and reducing wear over the course of the riding season.
Degreaser
In addition to the cleaning performed during the bike wash, I also like to clean my drivetrain with a degreaser and a rag. I regularly use a spray-on speed degreaser to knock any dirt and grime from the chain, cassette, and chainrings. Additionally, I will dampen a rag with degreaser to scrub any pesky grim from those components.
The beauty of spray-on speed degreasers is that they knock the grime right off and dry impressively fast. After just a minute or two, the degreaser completely evaporates from the drivetrain, leaving everything clean and ready to be lubricated.
Lubrication
Apply lubricant to the brake and shifter levers, the derailleur pivot points, and the cables right by the housings. Only a single drop is necessary in these locations, but it is helpful in keep the components moving smoothly.
Next, with your bike in a bike stand, backpedal your crank with one hand while applying lubrication with your other hand. You only need to apply lubrication for two revolutions of the chain.
A light bead of lubrication is sufficient; there is no need to douse your chain in lubricant. Excessive lubricant will simply be wiped off later, so save your money and go easy on the lube.
After applying the lubricant, I like to pedal forwards with one hand and shift through my gears with the other. This serves to allows the lubricant to work its way into the pivots of the chain, while also allowing me to inspect how the derailleurs are shifting.
Prior to adjusting the derailleurs and shifting, wipe off the excess lubricant. Simply hold the bottom of the chain with a rag and backpedal with your other hand. Allow the chain to run through the rag for at least two revolutions, removing any excess lubricant from the exterior of the chain.
It is important to wipe the chain to prevent the build-up of grease and grime. The lubricant that works its way into the pivots of the chain provides the only performance benefit, anything left on the outside of the chain simply collects dirt.
Finally, with the entire drivetrain cleaned and lubed, you can inspect the shifting of your bike and adjust as necessary. We will release an article dedicated to drivetrain adjustments, but you should be able to fine tune the shifting by simply adjusting the barrel adjuster of the derailleur cable. This will quickly adjust the tension of the cable and tune in the shifting effectively.
Check brakes
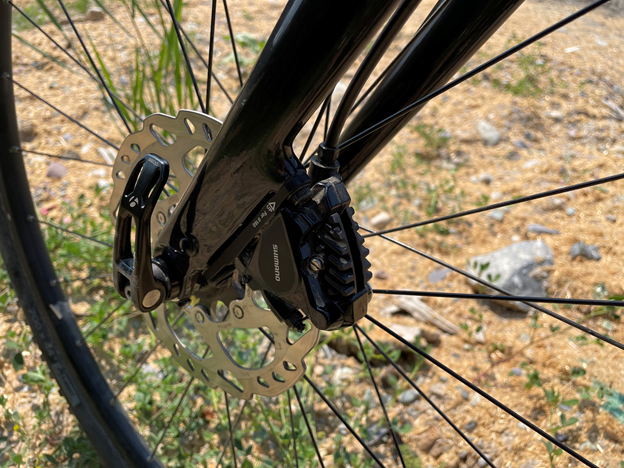
Brake inspection is a vital safety check, not only for preparation for the upcoming season, but also for each and every ride.
One of the most important preparations for the MTB riding season is a brake inspection. This step of the pre-season tune-up is an import safety precaution, especially for mountain bike riders who rely heavily on responsive, powerful braking systems.
Begin by cleaning the rotors of your disc brakes, if necessary. This can be done with a specific rotor cleaner or with rubbing alcohol.
Once cleaned, visually inspect the rotors for any damage or misalignment. If you are certain they are straight and in good condition, you can move on to your brake pads.
With disc brakes, you need to remove the pads to visually inspect their condition. If you are unsure of their condition, it is certainly worth removing the pads to inspect them. If you are confident that they are in good condition, you can skip this visual inspection and go based on “feel” during your test ride later.
Reinstall the wheels back on the bike once you are confident that both your rotors and pads are in good, clean condition.
Review the alignment of your rotors in the pads and adjust the brakes as needed. Adjusting disc brake alignment is relatively simple, you can just loosen the screws to move the brake housing and align it with the rotors.
It’s important to review the alignment of your brake housings to eliminate any rub on the calibers, which will prematurely wear your brake pads.
A few additional notes
1. Never squeeze your brake levers when the rotors are removed. This will cause your pads to get firmly stuck together, requiring you to pry them apart with a screwdriver, damaging the pad.
2. Hydraulic brake lines need to be serviced regularly. This should be performed by once every year or two and is a more complicated service. You can learn to do this at home or plan a mid-season service to have an experienced mechanic do this for you.
Final Tightness Check and Inspection
The final preparation to get your MTB ready for riding season is a once over of all the hardware on your bike. You will need a few allen wrenches and box wrenches for this step.
This will only take you a few minutes, but it is an important precaution that many riders overlook. You want to check every mounting bolt on your bicycle to ensure it is appropriately tight. This includes seat post clamp, handlebar mounts, brake and shifter levers, wheel axles, etc.
While it is unlikely that anything will fall off while you are riding, it is a good practice to ensure everything is tightened down and will not wiggle loose or move while you are riding.
This short step in the process is a safety assurance that could prevent any surprises or unexpected crashes. This will also allow you to fully inspect your bike and its components one last time, so if anything is damaged or in need of repair, you will likely be able to spot it.
When you are confident that everything is tightened down and ready to ride, take your bike for a short test ride around the neighborhood. This allows you to make any final adjustments necessary prior to hitting the trails, where it will be much less convenient to work on your bike. Test riding at home is extremely important – you don’t want any surprise issues on your first laps of the season.
Conclusion
Preparing your MTB for the riding season is an important pre-season preparation. It allows you to mechanically prepare your mountain bike, but it will also fuel the fire and excitement for the season ahead.
In years past, it was difficult but not impossible to get your bike into the shop to be serviced by experienced mechanics. In today’s cycling climate, this is more difficult and will take much longer to outsource this pre-season tune-up to your local shop.
Learning to do small tune-ups like this one at home is a great benefit for you. It will allow you to more completely understand the systems that make your bike work so well. It will save you time, as you will not have to wait weeks for the local shop to get around to working on your bike, and it will also save you money.
The steps described above will help you prepare your MTB for riding season and will also help you maintain the optimal condition of your bike throughout the season. If you run into serious issues or find a mechanical problem that you cannot correct, then we would recommend relying on your local shop for further help. Good luck getting your bike ready for the upcoming season, and happy riding!

Mitchell Turk is outdoors enthusiast with a lifelong passion for bicycling. He previously worked at his local bike shop before entering the world of engineering, and he may even enjoy geeking out over bike tech more than riding his bike!
Originally a roadie, Mitch dabbled in mountain biking for a couple years and then jumped on the gravel bike bandwagon. He now spends his free time seeking out gravel rides and weekend-long excursions. His ideal outing combines biking, hiking, and climbing for a whole-mountain adventure.