Now what? You’ve read through our Complete Guide to Bike Handlebars and picked yourself up the perfect set of handlebars, but they didn’t come wrapped in tape, and how do you get them swapped out with your current bars anyway?
You could take your bike into a bike shop and have them do this for you, but you may find yourself paying labor fees that add up to the price of your new handlebars. Bike shops charge a minimum labor fee and often have a back log of repairs to work through, especially during the spring and summer, so you can expect to wait a few days at a minimum, too.
Due to this, learning to do smaller repairs and tasks, such as putting on your new handlebars, is certainly worth the investment of your time and effort. You will save yourself a lot of money in the long run, and your bike will spend more time in your garage and less time in the shop. Less time in the shop always means more time for riding, so read on to learn everything you need to know about setting up and adjusting your handlebars.
Table of Contents
Removing the Old Handlebars
Before we can put the new handlebars on, the old ones must come off. The existing handlebar tape or grips must be removed, followed by the brakes and shifters, before removing the bars themselves.
Removing Dropbars
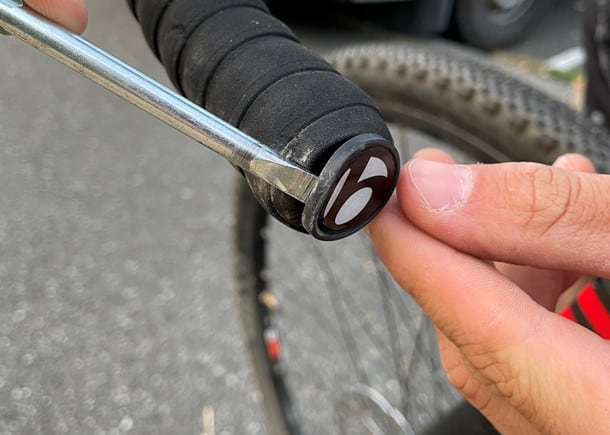
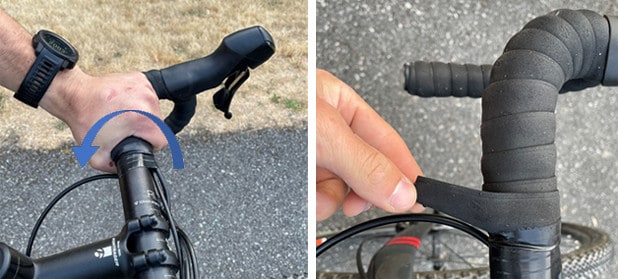
If you are removing drop bars from your bike, begin with removing the piece of tape that secures your handlebar tape, found closest to the stem. Once this is removed, the handlebar tape will unwrap easily. By rolling the rubber sleeve, called the hood, of the shifter away from the handlebar, you will be able to unwrap the tape down to the bar ends. Pop the bar ends out with a flathead screwdriver, and the handlebar tape will fall freely to the ground.
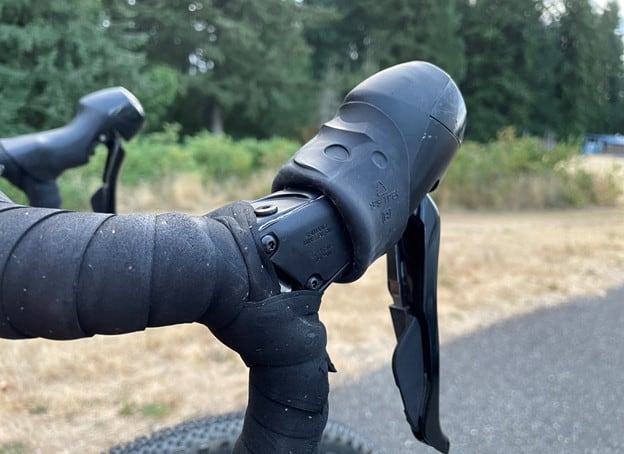
With the handlebar tape removed, you will see that the clamps for the shifters are now accessible. Loosen these enough to allow them to move freely and slide them off the handlebar. The brakes/shifters are still attached to the cables running down or through your bike, so allow them to hang from the bike until you are prepared to re-mount them. Be sure to not let them get tangled together to ensure the cable routing remains organized for when they are installed once again.
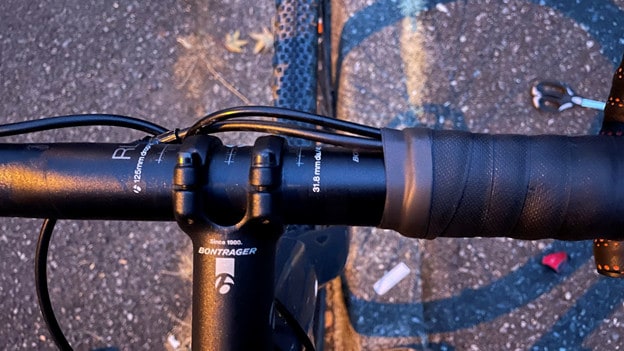
At this point, the handlebars are ready to be removed. This is done by simply loosening the four screws on the stem face plate and removing the handlebars. Be sure to set the four screws and the face plate somewhere safe, you will certainly need them later.
Removing Flat Bars
Removing flat bars is very similar to removing drop bars, perhaps even simpler. Begin by removing the handlebar grips. This part can be surprisingly difficult, so, if you are having difficulty, you can try one of the following tricks:
- If you have an air compressor, insert the tip of the nozzle underneath the grip and apply compressed air while pulling the grip. Be warned, they may shoot right off the handlebars!
- Apply rubbing alcohol underneath the edge of the grip and twist/pull the grip. As the rubbing alcohol spreads, the grip will eventually slide off. The rubbing alcohol will then evaporate quickly, without leaving behind any residue.
- If you are in a pinch and do not have rubbing alcohol, you can use the same technique described above with water or water and soap. Avoid using any oil-based products, as these will leave behind a residue and can make it even more difficult to remove your grips in the future.
After the grips have been removed, follow the same steps described above for the dropbars. Remove the brakes and shifters, allowing them to hang loosely. Then, remove the face plate, storing the hardware safely, and remove the old bars.
Install the New Handlebars
Mounting your new set of handlebars seems as simple as reversing the steps taken to remove the old bars, and, in some ways, it is. However, there are some tips and tricks to keep in mind that will make the new set-up much more efficient to dial in and ensure that you have everything set up properly to provide the best possible fit.
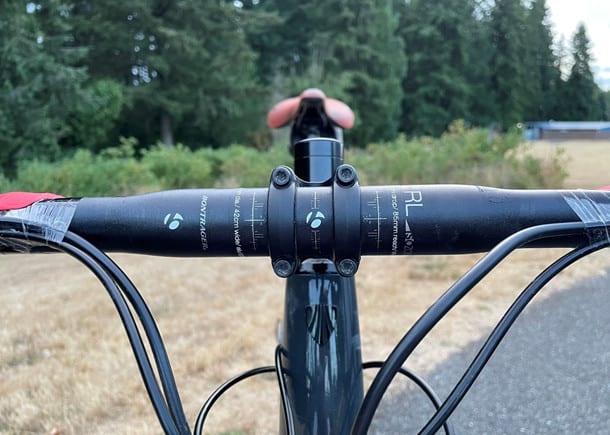
Begin by mounting the new handlebars to the stem using the four screws and face plate that were removed earlier. Tighten the screws in an alternating “X” pattern to ensure the clamp force is distributed evenly across the clamping surface. Do this by starting with the top-left screw for a half-turn, then the bottom-right, top-right, bottom-left, and so on, until the bars are firmly clamped, and the torque ratings are met.

Before doing the final tighten to lock everything in place, verify that your bars are perfect centered to the stem. Handlebars are typically marked, making it easy to visually confirm that they are centered.
Most bike stems will have torque ratings provided for these screws – it is important not to exceed these ratings. Be sure to use a torque wrench if you have one available to you. If not, I would recommend investing in one to avoid stripping screws.
Many parts on a bike provide specific torque ratings that ensure sufficient safety (you don’t want anything coming loose!) without damaging any threads on the components or on your bike frame. Failure to follow these ratings could result in needing to purchase replacement parts or stripped threads on your frame.
Installing and Adjusting Brakes & Shifters
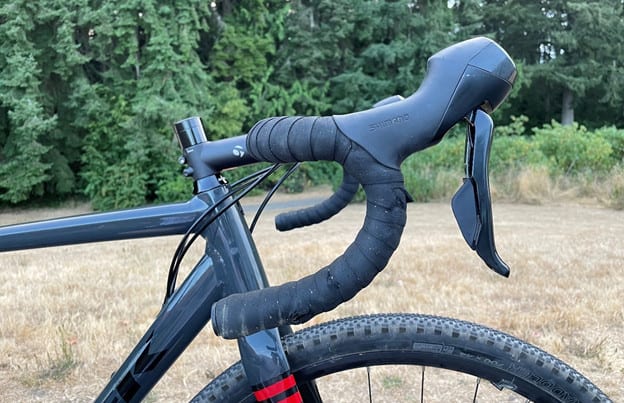
With the new bars firmly in place, you are ready to return your brakes and shifters to their home on the handlebars. Slide them onto your handlebars and lightly clamp them in the approximate location you expect them to be.
Dropbar Shifters
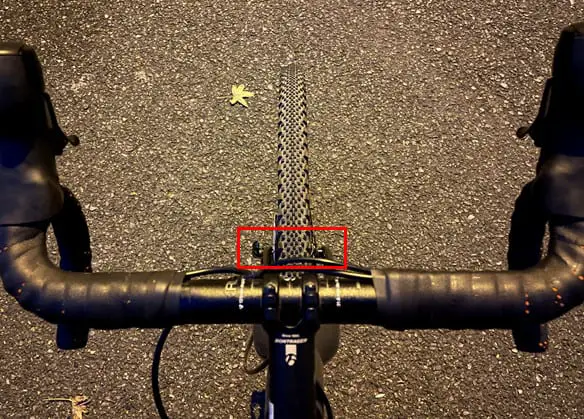
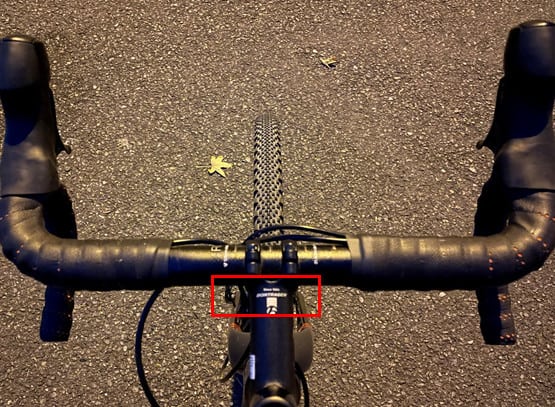
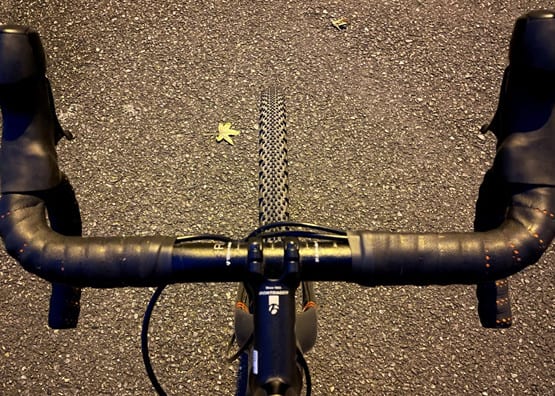
If installing shifters onto dropbars, start off by aligning the bottom of the brake lever with the bottom of the drop. This is done by holding a straightedge to the bottom of the drop, adjusting the shifter, and then tightening the clamp just enough to hold it in place. This is a good average setting for the shifter and can be adjusted later according to rider preference.
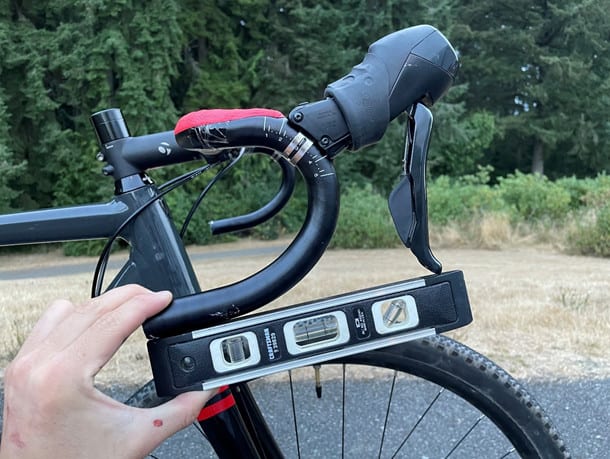
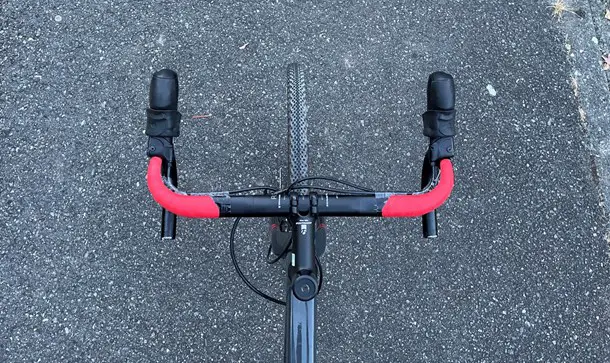
Repeat this installation for the opposite shifter, and then verify the vertical alignment of the two shifters. The vertical alignment can be checked by pulling a piece of string across the top of the two shifters. Look directly at your handlebars and verify that the string is parallel with the bars: this confirms appropriate vertical alignment.
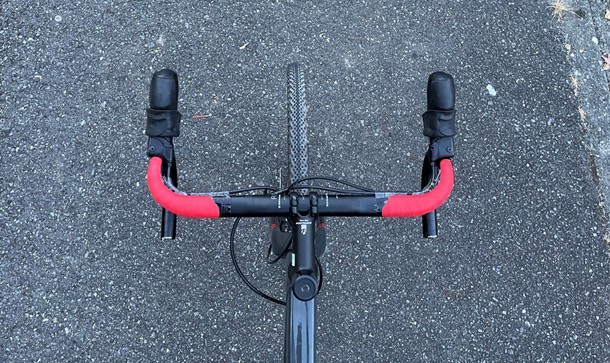
Next, look down on your handlebars from above. You want the shifters to be parallel to the body of the bike, so you can easily rotate the shifters about the handlebars to align them properly.
With the shifters adjusted, step over the top tube and feel the current alignment of the shifters. At this point, your shifters are set up in the “typical” alignment, but they can be adjusted according to your specific preference. After making any final adjustments, fully tighten the shifters in their final position, but leave the hoods rolled up for now.
Flatbar Shifters
Adjusting brakes and shifters for flatbar handlebars is simpler and more intuitive than dropbar shifters. Begin by sliding the brake onto the handlebars, leaving enough room to slide the grips back onto the bars without interference. Do not fully tighten the brake levers initially, as we will make some adjustments for final positioning.
With the brake levers mounted on the bar, the next step is the oftentimes challenging task of sliding the handlebar grips back onto the handlebars. The tips mentioned above can be used for remounting the grips: apply small amount of rubbing alcohol or soap and water to help the grips slide easily onto the bars. Both the rubbing alcohol and the soap and water mixture will evaporate without leaving behind unwanted residue.
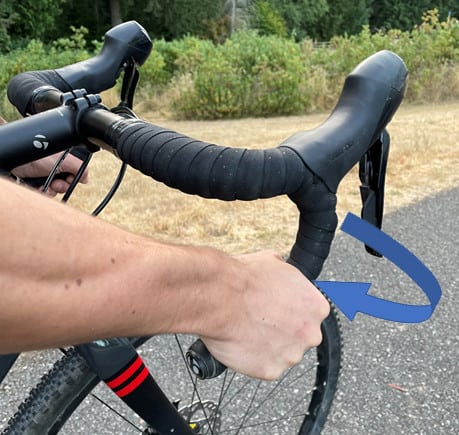
Out of the box, many flatbar bike shifters will be pressed up against the handlebar grips and positioned parallel to the ground. However, modern brakes, especially disc brakes, can be operated easily with just one or two fingers.
By moving the levers inwards, away from the grips, better leverage can be obtained for improved operation with just the index or index and middle fingers.
Additionally, the levers should be angled downward so that the hand position is naturally extended when holding the bars. You do not want your wrist to be bent backwards or forwards due to the angle of the levers, causing wrist strain and discomfort on long rides. A good starting point is to angle the levers 45 degrees below parallel. From there, just hop on your bike and further adjust the levers according to what feels most natural for you.
With the angle and horizontal position finalized, tighten down the clamps fully so that they do not come loose when riding. Look at your handlebars from the front and the side to check the consistency of the lever spacing and angle for both sides of your handlebar shifters. At this point, your flatbar handlebars are all set to go!
Taping Handlebars
Preparation
Dropbar handlebars require one additional step that some people find a bit tedious: taping your handlebars. With a little practice and patience, the finished wrap will look clean and tidy.
It’s important to note that different material and brands of handlebar tape will have different stretch and strength properties.
Before beginning your wrap, pull on a short section at the end of the tape to get an idea for how much stretch it has – this will help prevent breaking the tape during your wrap.
Additionally, if you are using white tape or another light color, thoroughly wash your hands or wear rubber gloves to help keep the tape clean during install.
Before beginning the wrap, consider the direction of the torque applied to the handlebars by the rider. When riding in the drops, riders tend to apply torque outwards, meaning the left side of the wrap should be counterclockwise (looking at the bar end) and the right side should be clockwise.
Alternatively, the rider tends to apply a backwards, pulling torque when riding on the tops. This would require the wrap direction to be reversed from that of the drops.
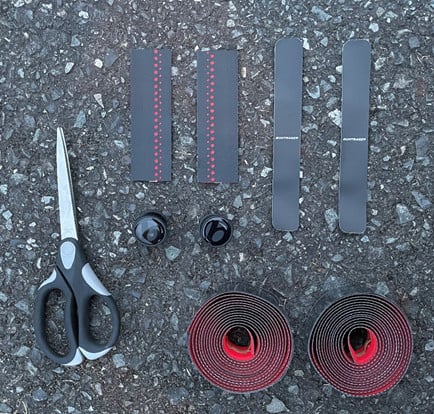
Before beginning the wrap, be sure to have all the necessary materials and tools laid out in front of you. You will need the handlebar tap, scissors or a sharp knife, bar end plugs, and finishing tape such as electrical tape. Pre-cut the finishing tape into two pieces of approximately 8 inches.
Wrapping Procedure
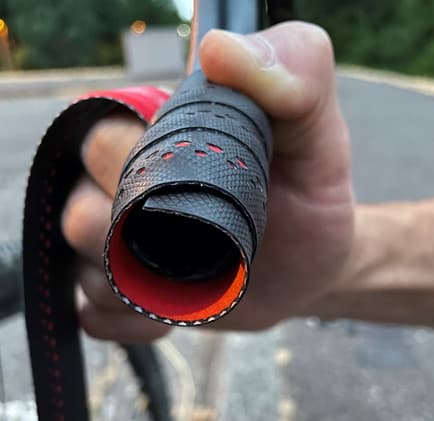
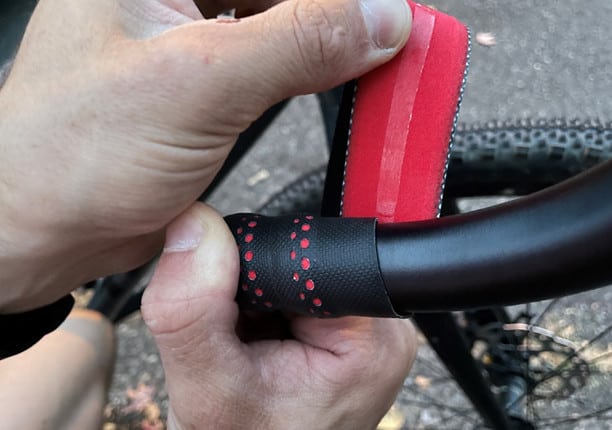
Begin wrapping at the bottom side of the bar end in the appropriate direction noted above. The first wrap will need to extend past the end of the bars, overhanging by approximately one half-inch. Pull with tension and perform three or four initial wraps.
Overhanging the start of the wrap by roughly half the tape width is essential for a clean finish when inserting the bar end plug.
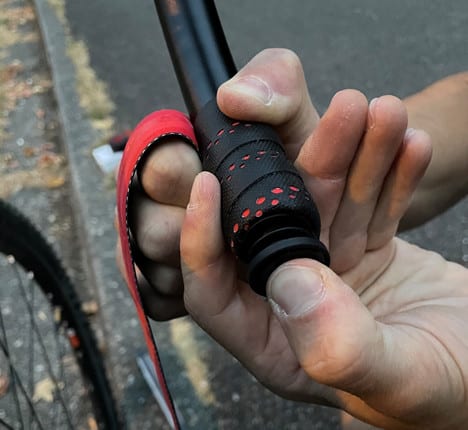
Tuck the overhanging tape into the end of the handlebar and insert the bar end plug. Ensure that the plug is tightly secured and that the tape looks tidy before proceeding with the wrap.
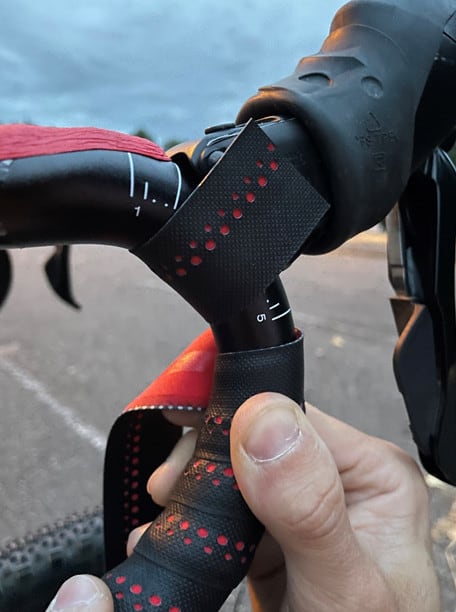
As you proceed with the wrap, you must sufficiently overlap the tape with itself. For tapes with an adhesive strip on the back, overlap the tape such that the adhesive is on the bare handlebar just past the previous wrap. For non-adhesive backed tapes, overlap the last wrap such that half of the tape is contacting the bare bar.
Maintain consistent tension as you wrap the tape, taking care not to break the tape or create any gaps in your wrap. Once you arrive at the lever body, you can use the lever to reverse the direction of the wrap, resulting in the desirable wrap we observed previously.
Handlebar tape is also sold with short pieces of tape that is used to cover the handlebar at the lever strap. Feel free to place this in position before passing the lever body to ensure there are no visible gaps in the tape.
Wrap the tape over the inside of the lever body and then up in the direction of the bar. After nearly a half-wrap on the lever body, continue wrapping around the bar, now in the opposite direction from the first section of the wrap, and matching the torque applied by the rider’s hands on the tops.
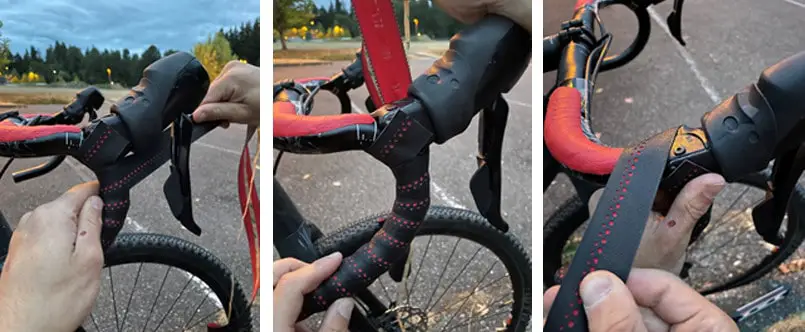
Continue wrapping the tape slightly past the desired end point, marking a squared line where you want the tape to end. Unwrap the tape by two wraps and perform the angled cut that you just marked. Re-wrap the end of the tape, noting the clean, squared finish of the wrap.
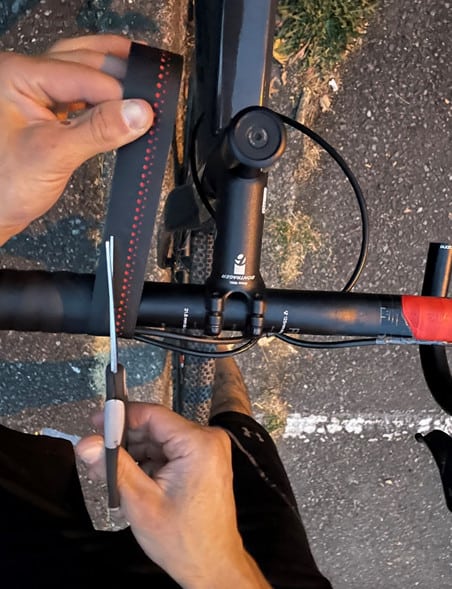
An angled cut provides a squared, clean finish. It’s good practice to mark this and then cut it, but I tend to eyeball the cut.
Finally, use your finishing tape to hold and cover the handlebar tape. Be sure to wrap this in the same direction as the handlebar tape. Repeat this procedure for the other side of the bar, and you are all set to ride!
Check the Stem Length
With new handlebars successfully installed, let’s take a brief minute to confirm that the handlebars are mounted to the appropriate length stem. If you haven’t done this before when being fitted to your bike, it’s an easy step that can make a large impact on the comfort of your handlebars.
Mount your bike and assume a riding position. This is easiest if your bike is on a trainer or being held upright with some assistance, but you can also just hop on and go for a short spin around the neighborhood. In you natural riding position, look down at your handlebars/front wheel axle, without craning your neck or breaking from your ride position.
On a dropbar bike, the front wheel axle should be hidden from view by the handlebars. If the axle is visible above the handlebars, then the bars are probably too close to you, and you would benefit from a longer stem. Conversely, if the axle is visible beneath the handlebars, your stem is likely too long and you are reaching too far.
Again, this is a quick check to verify the handlebars are the ideal distance for a comfortable reach. The check described above is a general rule-of-thumb, and your own personal preference should always come first to be as comfortable as possible on your bike.
FAQ
Can I reuse old handlebar tape?
Surprisingly, you can! I’ve re-wrapped my handlebars using the same tape to correct the wrap. If the tape is not damaged, it can certainly be reused. Be careful when unwrapping to avoid tearing the tape and try to replace it in the same pattern, if possible. This makes it simpler to accommodate any stretching that has occurred to the tape. For a simple bar swap, if you don’t want new tape, go ahead and try to reuse the old tape.
Can I cut off my handlebar grips?
If you purchased replacement grips, then go right ahead and cut them off. This will certainly be easier than trying to pry them off, and, if they are just going to go in the trash, there’s no harm done in cutting them. However, if you do choose to cut them, they will obviously not be able to be reused.
How do I run cables underneath my handlebar tape?
Cables can be easily taped to the handlebar to hold them in position. This is typically done with electrical tape or fiber tape. Then, proceed with the wrap procedure as described above, resulting in a tidy look with the cables cleanly routed under the tape.
I fell while riding, and my brake lever is rotated out of position. Do I have to unwrap my bars to fix this?
You may be able to turn your lever back into alignment without unwrapping, but you will then want to tighten down the lever strap to prevent any future movement. Whether or not you need to unwrap the tape depends on the brake levers you have on your bike.
Some levers can be tightened by simply rolling up the hood and accessing the hardware, but others may still be inaccessible at this point. If this is the case for you, you should consider unwrapping and rewrapping your tape to effectively tighten the lever strap.
Conclusion
Whether you prefer dropbars or flatbars, swapping out handlebars is a task you can learn to do at home. With the right tools, practice, and patience, you will feel confident working on your own bike, whether it’s to swap out the handlebars, adjust the brake levers and shifters, or retape your bars.
Follow our guide above and try it yourself next time you need to make any adjustments to your handlebar set-up.
In the long term, you will save a lot of money on labor costs, and you will also get the gratification that comes from acquiring new skills and customizing your own bike with your own two hands.

Mitchell Turk is outdoors enthusiast with a lifelong passion for bicycling. He previously worked at his local bike shop before entering the world of engineering, and he may even enjoy geeking out over bike tech more than riding his bike!
Originally a roadie, Mitch dabbled in mountain biking for a couple years and then jumped on the gravel bike bandwagon. He now spends his free time seeking out gravel rides and weekend-long excursions. His ideal outing combines biking, hiking, and climbing for a whole-mountain adventure.