The shape and position of your bike’s handlebars have a huge impact on how your bike is going to handle and the position you’re going to be in while riding. There’s a bike for every occasion, but people turn to road biking for increased aerodynamics and efficiency compared to the rest of the competition.
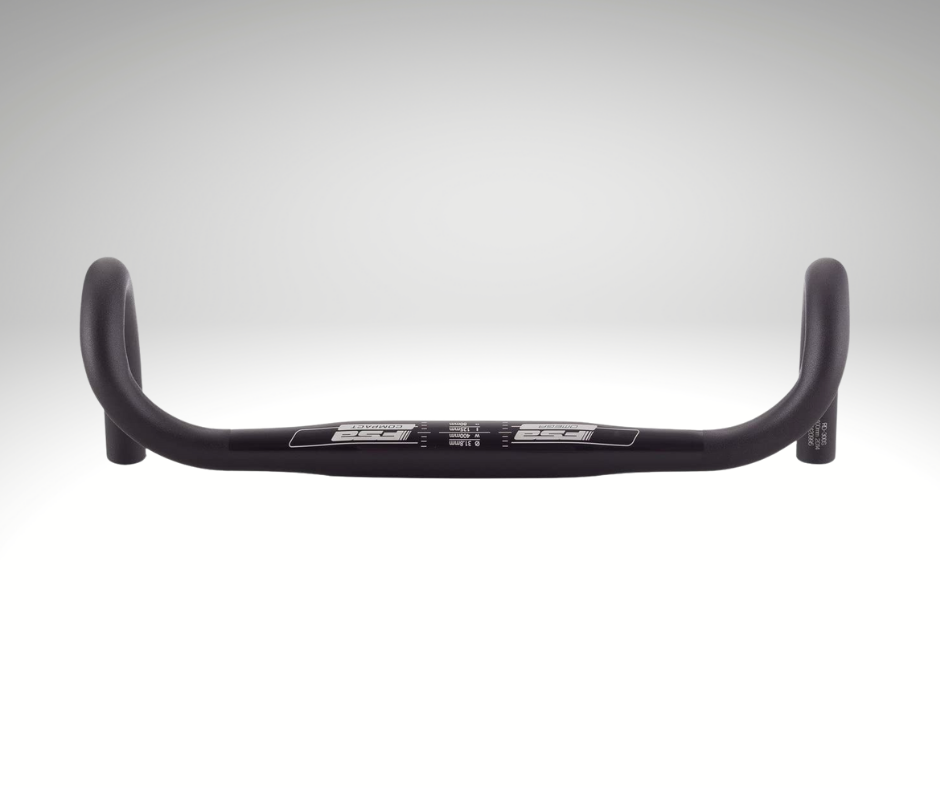
Most of the increased efficiency from road bikes comes from the drop bar handlebars that often come on road bikes. These handlebars offer you a super-low, streamlined position of the back for power and fast descents. Sleek drop bars are usually much shorter than other types of handlebars, giving you the ability to tuck in your elbows and become incredibly compact. If you get tired, you can rest your hands in two other hand positions on the bars.
Road biking prizes bikes that are efficient, aerodynamic, and slender. While that’s great for timed rides or longer loops, your handling and comfort can take a hit. Flat handlebars offer a wider grip, giving you increased comfort in the shoulders and improving your handling. They also elevate your head and torso more, making it easier to see around traffic and spot potential hazards.
If you’re considering swapping out your road bike’s handlebars for flat handlebars, it can be done! That being said, there are a number of potential factors that could make or break your project, or significantly increase the price. In this article, we’ll go over the process of swapping out your drop bar handlebars for flat bars, what you’ll need for the job, and the different factors that can influence the overall cost of this project.
Best Flat Handlebars for Road Bikes
As with so much in the cycling world, the best flat handlebars for road bikes are really just the best handlebars for you. There are a number of factors to consider when choosing a handlebar, and your individual size and needs will be your truest guiding principle. Here’s a few things to consider:
Table of Contents
Diameter of Handlebars
Handlebar stems have very specific clamp diameters, which will make or break your handlebars’ fit. Therefore, you need to make sure that the diameter of the center of the handlebar is an exact fit with the diameter of the clamp. The clamp diameter will usually be engraved on the side of the handlebar stem, near the clamp itself. If not, you can contact the manufacturer and they can tell you.
Be careful with this: the handlebar diameter is a precise measurement, and your ability to use a handlebar can be ruined by just a few millimeters. All is not lost though: there are handlebar shims if you want to make the perfect handlebars work for a clamp that’s slightly too big.
Width of Handlebars
The width of your handlebars will have a huge impact on how your riding feels and functions. A longer handlebar will give you more control over the wheel compared to a shorter one, but will require more effort from your arms and shoulders.
Shorter handlebars allow you to stay more compact and avoid air resistance, but will have finer handling requirements. It may also cause a pinching in your shoulder joints if the bar is too short.
In general, you’re looking for a handlebar that gives you a 90 degree angle between your arms and shoulders. While longer or shorter handlebars may have sport-specific or stylistic advantages, this rule of thumb will help you maintain maximum comfort for longer rides.
Upsweep
Riding posture is one of the biggest reasons that cyclists decide to swap out their handlebars, and one of the biggest factors in your riding posture is how high your handlebars rise. Handlebars with higher upsweep will increase the angle of your back, raising your head just a bit higher. They will feel more supportive, but can add some extra pressure on the wrists due to the uneven grip created by the angle of the bar.
While the amount of upsweep on handlebars can vary widely, most agree that around four degrees of upsweep is the most comfortable. Play around with it though: the best fit is the best fit for you!
Flat Bar Road Bike Conversion Kit
In order to swap out your handlebars, you will need:
-new handlebars, the diameter of which is the same as your bike’s stem clamp diameter
-new grips, as your drop bar uses bar tape for grips
-new shifters, compatible with your new handlebar and the amount of cogs on your cassette, both front and rear
-new brake levers, compatible with your new handlebar
-allen wrenches (you can use a multi-tool)
-torx wrenches, depending on whether your handlebar stem uses this bolt style
-a tape measure
-a bike stand
-grease or other lubricant, to lubricate the handlebar stem
How do you convert a drop bar to a flat bar on a road bike?
Converting your road bike’s handlebars to a flat bar setup requires some know-how and elbow grease, but is absolutely something you can do yourself. I’ll provide an overview in this article, but if you need a visual, you can check out this great guide by the pros over at Global Cycling Network for how to remove your old drop bars, and this guide by Park Tools on how to attach the new flat handlebars.
Swapping out your Handlebars
- Place your bike in the bike stand, and secure it so that you can safely remove the handlebars.
- Pull back the shifter hoods, and remove the bar tape from the handlebars. This will allow you to remove the old components.
- Remove the shifters from your handlebars: this can be done by using an Allen wrench to unscrew the bolt holding the shifter and brake lever to the handlebars. Once that’s done, you can either completely unscrew the bolt and detach the shifter, or loosen the bolt to then shimmy the shifter and brake off the handlebars.
- You’ll need to disconnect your brake and shifter lines in order to swap out the handlebar. This can be complex, so don’t be afraid to take it to your local mechanic! The process will also depend on what type of brake lines you have: hydraulic brake systems have a more complex process than mechanical brakes.
- Once all the components are off of your handlebars, undo the four bolts on the front of the handlebar stem with your Allen or Torx wrench. This will release the handlebars, allowing you to pull them off the handlebar stem.
- Now you’re ready to install your flat handlebars! Place the new handlebars into the face plate that you removed from the front of your handlebar stem. Tighten the bolts, taking care to slowly tighten all four bolts at a similar rate to prevent lopsided tension.
- There will be markings on most handlebars that let you know where to center the bar, and guide you to the right angle. While the angle of the handlebars can vary based on personal preference, be sure your handlebars aren’t off-center!
- You’re now ready to add on the shifters and brakes. Slide the shifters onto the bike, making sure they’re level and at a good distance for your hands. You can ensure that they’re level and equidistant by using a tape measure to measure from the center plate of the handlebar to the shifter. Once you’re sure they’re even, you can adjust the angle of the shifter to your preference before tightening the bolt to secure the shifter.
- Repeat the process for your new brakes, adjusting the angle to your preference and ensuring that the brakes are reachable for your fingers. It can be helpful to take the bike off the stand in order to stand over it and check that the grip feels natural.
- After the shifters and brakes are on, you’ll need to reconnect your lines. This will vary for each bike, so be sure to follow the specific process for each bike and setup.
- Add on your new grips, adjust the angle, and tighten to secure them to your handlebars.
- Your bike now has new handlebars! Make sure to give it a test ride and adjust the angles and spacing of your kit as you see fit.
Cost to Convert Drop Bar to Flat Bar
Unfortunately, converting your road bike’s handlebars to a different style is one of the more expensive mechanical works you can do to your bike. When you’re figuring out the cost, you need to factor in the need for new handlebars, shifters, brake levers, and the labor hours it’s going to take to get all of this put on.
When it comes to parts, you’re going to be spending at least $100 for all the necessary components, but it could be much more depending on what quality you’re looking for. When you add in the labor costs, you could be looking at a cost as high as $500, or more if you want the top of the line. I’ve personally seen handlebars as expensive as $400, so be mindful of your budget and don’t let one flashy component empty your pockets.
Labor is an entirely separate concern, and can have a big impact on your overall spending for this project. Some mechanics can charge as much as $100 per labor hour, so you can save a lot of money by performing this process yourself. That being said, this is a more complicated task than most basic repairs, so be sure you have the experience to handle it, or have someone on call in case it goes awry. Learning how to work on your own bike is admirable, but not if you just end up breaking your bike!
Know Your Limits: When to Sell and When to Swap
If you’re confident that all your bike needs is a different posture to be your dream bike, then it makes sense to swap out your drop bars for flat handlebars. So many of us are riding the perfect bike for us, but have one feature that we would fix. If that’s what led you to this article, then I highly recommend swapping your handlebars and finally owning the bike of your dreams.
If, however, you’re unsure whether road biking is for you at all, or if you have multiple issues with your bike outside of the handlebars, it may mean you’re on the wrong bike. Oftentimes buyer’s remorse can motivate us to make changes in the hopes that it will solve all the issues we have, but really we should cut our losses and find a new bike.
The process of changing your handlebar style is not simple, and isn’t worth the trouble if you’re not sure you’re on the right bike. Before you undertake the task of changing your drop bars to flat bars, be honest with yourself and ask if you want this bike at all. It may be a hassle to sell your bike and get a new one, but it’s worse to ride the wrong bike!

Alex Mwangi is the creator of Outdoor Right and an outdoor enthusiast. During his free time he enjoys riding his road bike or traveling the world looking for his next adventure.

