There are many reasons campers could desire a tent with a stove jack. One of the most pleasant feelings in the world is falling asleep cozy and warm in a tent, but sometimes outside conditions pose threats to a comfortable night’s sleep.
Camping is, at its heart, a celebration of the wonders of the natural world. It is an experience that allows people to get reacquainted with the land that surrounds them, intimately engaging with the elements in ways that a night at home do not typically permit.
When most people think of camping, the first thing that comes to mind is a mellow night by the campfire, roasting s’mores and enjoying the company of family and friends. Iconic imagery of camping in movies and television often depicts the closeness of sharing a night by the fire, then retreating to a tent for some warm rest.
The only thing that could enhance your enjoyment of this idealized experience is bringing the warmth of a fire into the tent with you—and no, not by setting your tent aflame.
A stove jack is the key element of rigging a tent for maximum warmth and comfort. Stove jacks are vents in the body of a tent. They allow for a wood-burning stove chimney to vent noxious gasses into the atmosphere, and outside of the air you breathe in a tent. There are plenty of tents with pre-installed stove jacks on the market, but you can make your own (with a few caveats) in a few simple steps.
Click this article to see if you can put a stove in a nylon tent.
Table of Contents
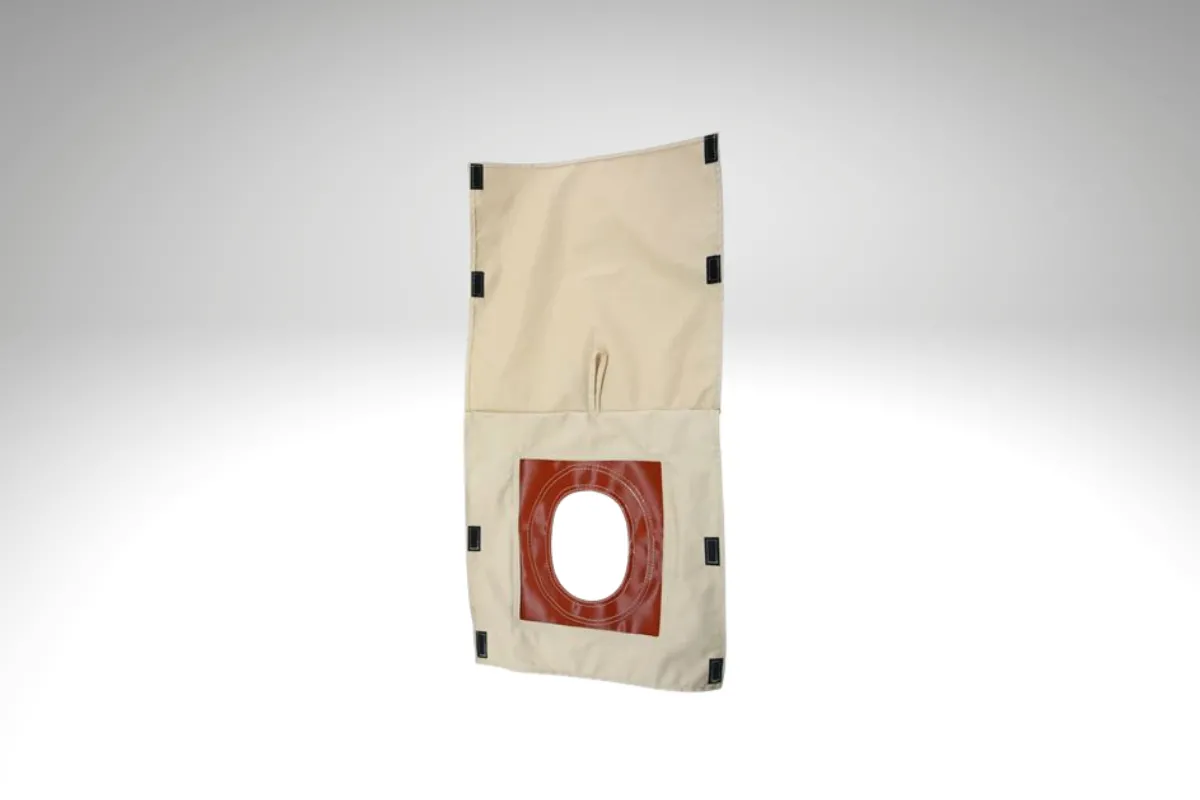
Step one: Gather Materials and Prep your Tent
The main purpose of a stove jack is to protect the material of your tent from burning up from the hot metal of the chimney. Silicone-fiberglass fabric is the best option for heat resistance, along with stability and ease of installation.
You will need a sheet of fabric that is large enough for the chimney to pass through, with around two inches of buffer room between the stove opening and the tent material. Then, you need to cut a hole in the fabric that is the exact diameter of your stove’s chimney.
If you like, you can also cut a small flap to cover the hole in the stove jack when you are not connecting your stove.
Next, you need to cut a section of the tent wall, a little bit smaller than the stove jack fabric. This opening will be insulated when you attach your stove jack.
In addition to the physical materials of the stove jack itself, you will need some materials to attach it to your tent.
Step two: sew, glue, or velcro
There are a few options for attaching your square of fabric to the tent.
You can use some form of super glue, lining the edges of the jack and pressing it onto the opening of your tent.
You can also sew the stove jack onto the tent, using either a sewing machine or hand-needling it.
Additionally, you can attach Velcro strips to the outline of the hole on your tent material. Then, attach Velcro strips to the outline of the jack and stick it to your tent. This is a good solution if you shove your tent into a bag often and do not want to bend or harm your stove jack.
Step three: connect your stove
The last step is simple—you take the chimney, feed it through the hole in your stove jack, and connect it to your wood-burning stove.
Always make sure that the stove and jack are properly functioning and venting before you spend the night in your tent. If successful, your stove chimney should be emitting smoke outside of the tent, with no gas or smoke leakage inside.
If all of this seems a bit complicated, there are plenty of companies that sell DIY stove jack kits, cutting the fabric for you; all you have to do is attach them to a hole you cut in your tent.

Alex Mwangi is the creator of Outdoor Right and an outdoor enthusiast. During his free time he enjoys riding his road bike or traveling the world looking for his next adventure.